Make a Blog using Django Part 1
Sep 17, 2015 · 5 Min Read · 1 Like · 1 Comment
This post is now deprecated. Please follow the official tutorial for creating your first django application.
“Making a blog using django” - is probably the most made tutorial of Django. This post is no different. But I made this in my own way using some of django’s built-in features so that less coding is required and making it more understandable with minimum packages to use.
To view the working source of this tutorial, check here at: https://github.com/ruddra/myblog
Requirements
Before jumping to the main event, see if you have these installed in your pc:
- Python 3 installed in the computer. (Or python 2.7 if you prefer)
- Django 1.7 installed in the computer.
intro on django framework
Django appears to be a MVC framework, but instead of using the name ‘Controller’, we call it as ‘View’ and ‘View’ as ‘Template’, Also Django is not a CMS. It’s a Web framework; it’s a programming tool that lets you build Web sites. More information can be found in django’ documentation.
So as we stated before, django appears to be a MVC framework. MVC is a framework for building web applications using a MVC (Model View Controller) design:
- The Model represents the application core (for instance a list of database records).
- The View displays the data (the database records).(Here it is called “Template”)
- The Controller handles the input (to the database records).(Here it is called “View”) **(copied from here http://www.w3schools.com/aspnet/mvc_intro.asp)
Django manipulates data in the database using ORM(Object Relational Model). ORM saves you a lot of time by making the structure of the database, running CRUD(Create Read Update Delete) operations etc. Django ORM builds the structure of the database using the structure of the model. It means, the way you define the model, the way your database structure will be. A model is the single, definitive source of data about your data. It contains the essential fields and behaviors of the data you’re storing. Generally, each model maps to a single database table.
Project setup
Now let’s start a project named myproject in desired directory using this command: django-admin.py startproject myproject. Then, create an app inside the myproject directory using python manage.py startapp myblog. So the structure should look like this:
myproject/
    manage.py
    myproject/
        __init__.py
        settings.py
        urls.py
        wsgi.py

    myblog/
        __init__.py
        admin.py
        migrations/
            __init__.py
        models.py
        tests.py
        views.py
This reusable app is going to be used for making the blog. More about reusable apps.
Append ‘myblog’ to myproject>myproject>settings.py’s INSTALLED_APP like:
INSTALLED_APPS += (
    'myblog',
)
Create models
Now we start by making a blog by making models. In this project, we are going to display Title, Body, Tags in each post. So for each content in a post, database’s table is going to need a field. So in our model, we are going to add those fields to myproject>myblog>models.py like:
from django.db import models

class Tag(models.Model):
    name = models.CharField(max_length=255)
    description = models.CharField(max_length=255, null=True, default='')

    def __str__(self):
        return self.name


class MyBlog(models.Model):
    title = models.CharField(max_length=255)
    body = models.CharField(max_length=20000)
    tags = models.ManyToManyField(Tag)

    def __str__(self):
        return self.title
The reason for making these structure is that:
title: It is a
CharField(Character Field) which can take any kind of input.body: It is a
CharFieldwhich can take any kind of input.tags: A
ManyToManyFieldrelation with Model Tag, because a blog can be related to multiple tags similarly a tag can be used to different blogs, hence many to many relation.
Database migration and more
The model class Tag is going to be used for making/displaying tags. Now we have made model for blog, need to use ORM for making Database structure and add aditional data(Why migration is necessary? See the documentation. So for that, go to myproject directory where manage.py resides and run:
$python manage.py makemigrations

$python manage.py migrate

$python manage.py createsuperuser --username=admin --email=me@ruddra.com
#it will ask for setting a password

$python manage.py runserver
# for running the server
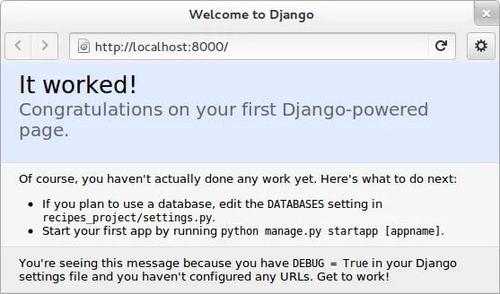
The third command for making a superuser in the system. The fourth command will run your project in this url: 127.0.0.1:8000(if you don’t provide any specific ip/port). Or you can run like this python manage.py runserver 0.0.0.0:8000 and it will make your project run in 0.0.0.0:8000 and this is accessible from browser. The webpage will look like this when the project runs successfully:

So you have successfully ran the django site.
Admin site
Now the database has been made and superuser has been created, so we go the next step, creating blogs. We are going to use django’s one of the most powerful and popular feature, django’s admin site. For making admin site visible and accessible, you need to add this lines to your urls.py (myproject>myproject>urls.py):
from django.conf.urls import patterns, include, url
from django.contrib import admin
admin.autodiscover() #this line is for making model visible in admin site


urlpatterns = patterns('',
    url(r'^admin/', include(admin.site.urls), name='admin-site'),
)
This lines will let you access the django’s admin site using this url: 127.0.0.1:8000/admin (if you are running this project in localhost).
Now we need to modify the admin.py in myblog’s directory to register the app to admin site.
# Location myproject>myblog>admin.py
from django.contrib import admin
from django import forms

from myblog.models import MyBlog, Tag

admin.site.register(MyBlog)
admin.site.register(Tag)
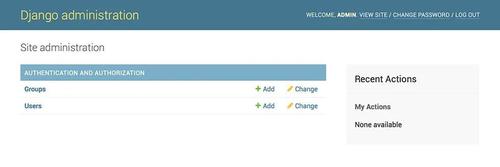
Now your admin site will look like this:

In conclusion
So up-to admin site, the making of blog is complete. Next part will be provided in next post. Cheers!!
Last updated: May 04, 2025


Great! Thanks!